Coloring isn’t just for kids – it’s a great stress reliever for everyone! Some of our team members sure do love a good coloring sheet. In honor of National Coloring Day, on September 14th, we have an Abundance Organizing coloring sheet for you! Just print out the attached PDF above and let your imagination soar. For many creative people, crafting is a passion. And where there is a passion for crafts, there is usually a sizable craft stash. If you haven’t done so already, we recommend setting up an art center. Ultimately, getting this organization in place will help you to stay inspired. Here are some tips for setting up an art center and for keeping it organized.
1. Get the large items in place…
There are some definite musts needed to set up your art center, but you can be creative, and tailor this area of your home to your specific needs. Here are a couple of the essentials we recommend:
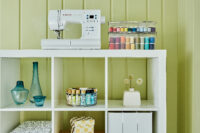
A table.
A table for drawing, painting, sewing, and pretty much anything else is pretty important to have. Just don’t forget a cover for the table to protect it. You need some space to be able to work in your art center – just go ahead and dedicate a table to it.
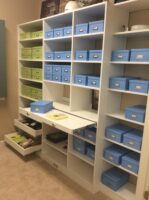
A shelf or cabinet.
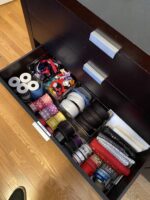
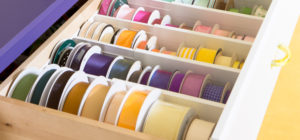
Get a shelf or cabinet with drawers for paper, markers, crayons, glue, and all the other small supplies you have. Use drawer dividers to keep like with like. You will be able to more easily view and access your supplies, which will make it easier to craft.
A closet.
Have a closet to spare? This makes the perfect storage for a bustling art center. Closets work so well to keep craft supplies organized and accessible. So many organizing products work well in them, and then at the end of the day all arts and craft supplies can be neatly put away.
A rolling cart.
Don’t want to dedicate a whole closet to arts and craft supplies? A rolling cart is a perfect solution. You will essentially have a portable art center and be able to roll your cart to any surface that is most convenient, while still keeping your supplies easily accessible and contained.
2. Add in your organizing products…
The right organizing product can make all the difference in the world. Choose your products for the space they are in and for the items that you are going to containerize.
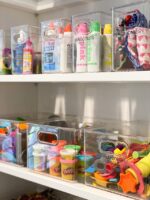
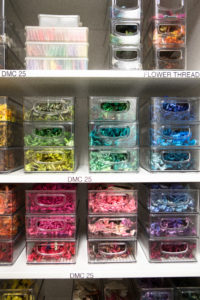
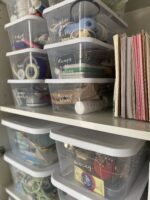
- Clear bins are ideal for paints, clay, glitter, string, beads, etc. Since kids can see all of their supplies, clear bins are great to get their creativity flowing.
- Sterilite bins are a great organizing product that comes with a lid making them stackable. They come in an assortment of sizes so that you can choose what size works best: Sterilite 6qt, Sterilite 16qt, Sterilite 56qt.
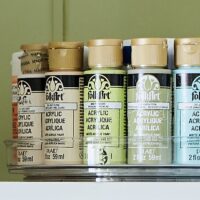
- Turntables work wonderfully for storing everything from crayons to acrylic paints. They are easily accessible, too.
- An over-the-door shoe organizer is a great way to organize yarn or other small craft supplies.
- Magazine holders are a great way to store crafts that you are currently working on. You can quickly clean up the craft and put it away without completely interrupting your progress.
- A basket can be a very beautiful thing! Art, craft, and school supplies are quite organized, contained, and easily transported when all housed in a basket.
3. Display your artwork!
Whether it is you or your children that are passionate about arts and crafts, you know that supplies and finished products can accumulate quickly. Find ways to display and enjoy the arts and crafts that you or your children create! Here are a couple of ideas to use that artwork in your everyday life:
- Create your own art gallery! Use a blank wall as the place to hang and display all the paintings and drawings. Keep pieces rotating on a monthly basis. What better way to show off your art center than by the very pieces created in the space?
- Do you create another type of art such as macrames or quilts? You should definitely incorporate these into the decor of your home. Proudly display your artistic talent and let others enjoy the beauty that you have created!
- Make placemats out of artwork. This is especially great with kids’ artwork. Just laminate those drawings and voila…you have placemats. Your kid will be quite proud and you can keep rotating these in and out as those little artists create new drawings.
- Turn that pottery into cherished gifts to family members and friends. Who wouldn’t jump at the thought of receiving something made by a friend or family member?
Bonus Tip – Less can be more.
There are lots of groups set up to trade and sell supplies, and hundreds of articles about how to declutter, but this is still a really tough category to get through. While few things are as satisfying as turning art ideas into reality, the sad reality is that, when the stash exceeds the storage, it puts a real damper on creativity. If your art center is too crowded, there will be no room to work. You will feel burdened instead of inspired. Do the hard work of deciding what truly serves your goals now, what inspires you today, and what you can realistically use in the amount of time you have….Then let the rest go! You will feel a weight lifted and creativity will start to flow again. SCRAP RVA will not only take your donations, but they are a nonprofit with a mission to inspire creative reuse and environmentally sustainable behavior by providing educational programs and affordable materials to the community. It helps to know you are supporting something much bigger when you send your donations here. Read more on their website about how and when to donate.
Don’t forget the attached coloring sheet. We would love to see photos of your finished coloring sheets in our Abundance Declutter Group on Facebook!